
Assemble Installations


The following pages show you the complete assembly process.
The Kit Set has been pre drilled so requires very few tools to complete it.
We don't touch the van as the Kit set has been designed to firmly lock into place allowing it to be removed and refitted into a later model van in years to come.
We have worked out the easiest procedure and recommend this as you will find it the most effective way.
次のページでは、組み立ての完全なインストール手順を示します。 キット セットは事前にドリルで穴が開けられているため、完了するのに必要なツールはほとんどありません。 キットセットは所定の位置にしっかりとロックされるように設計されているため、バンには触れません。
これにより、取り外して、今後数年後に新しいモデルのバンに取り付けることができます。 最も簡単な手順を作成しましたが、これが最も効果的な方法であることがわかるため、これをお勧めします。
これにより、取り外して、今後数年後に新しいモデルのバンに取り付けることができます。 最も簡単な手順を作成しましたが、これが最も効果的な方法であることがわかるため、これをお勧めします。
The following tools will be required.
Kit set assembly - battery drill , clamps, router for rounding off the edges. The edges can be hand sanded but it is much easier with a little router.
Driver bits , sand paper ,120. - 200 grit
3mm router bit , counter sink head for drill.

以下のツールが必要になります。 キット セット アセンブリ - バッテリー ドリル、クランプ、エッジを丸めるためのルーター。
エッジは手で研磨することもできますが、小さなルーターを使用するとはるかに簡単です。 ドライバービット、サンドペーパー、120。 - 200 グリット 3mmルータービット、ドリル用カウンターシンクヘッド。
Im sure many of you will be familiar with assembling basic wooden
furniture but if you are not follow this procedure for a
great result.
Although it might look complicated its should be relatively
easy when you get started.
あなたの多くは、基本的な木製の組み立てに精通していると確信しています ただし、この手順に従っていない場合は、 素晴らしい結果です。 複雑に見えるかもしれませんが、比較的 始めるときは簡単。
Step 1 Find all the pieces as shown in the images and sort
into groups
Step 2 Assemble the work bench. The kit set comes with
legs and we use the bed base as the work bench.
Step 3 Assemble components.
We suggest you assemble the units in the following order.


ステップ 1 画像に示されているようにすべてのピースを見つけて並べ替えます グループに ステップ 2 作業台を組み立てます。キットセットが付属 脚とベッドベースを作業台として使用します。 ステップ 3 コンポーネントを組み立てます。 次の順序でユニットを組み立てることをお勧めします。
Plant Holder
Wine glass holder
Cup stand
Kitchen slide box
プラントホルダー ワイングラスホルダー カップスタンド キッチンスライドボックス

Plant Holder
プラントホルダー

Cup Stand
カップスタンド

Wine glass holder
ワイングラスホルダー

Kitchen Box
キッチンボックス


Draw
描く


The 2 runners screw to the cabinets later on.
2 つのランナーは後でキャビネットにねじ込みます。
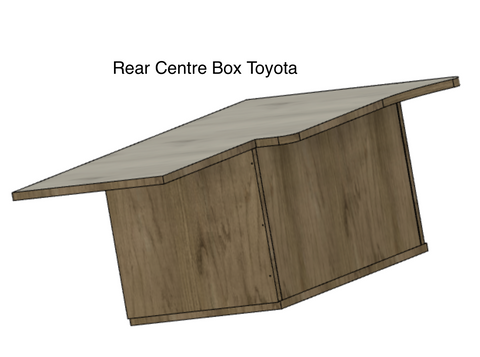
Rear Box Seat
リヤボックスシート


Center Beam and Bed Guide
センタービームとベッドガイド


The bigger flat piece is the horizontal support that runs between the two uprights. This is fitted latter at installation stage.
より大きな平らな部分は、2 つの直立物の間を走る水平サポートです。これは、インストール段階で後で取り付けられます。
Drivers seat tray
運転席トレイ


Below image is the drivers seat tray for the ford transit.
![]()
Rear Locker
運転席トレイ


Kitchen Lockers
キッチンロッカー


Kitchen
台所


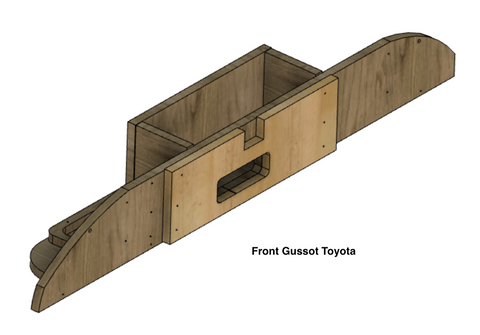
Front and Rear Gussets
フロントとリアのマチ


Rear Locker Dropdown Seat
リアロッカードロップダウンシート


Rear Cabinet
リアロッカードロップダウンシート


Rear Cupboard and bench
後部食器棚とベンチ


Front Cabinet
フロントキャビネット


Bed
ベッド


Uprights
アップライト

Floor
床

Wardrobe
ワードローブ

The wardrobe cupboard is the last component that we install and so we fit this in the van as opposed to building it at a component.
ワードローブの食器棚は、最後に設置するコンポーネントであるため、
コンポーネントで構築するのではなく、これをバンに取り付けます。


Full electrical and plumbing instructions will be supplied.

These are very simple procedures using all off the
shelf parts.

The electrical and plumbing components are available
from all hardware stores and are easily found.

The bed raising mechanism is very easy to install.
Instructions will be supplied.

Have a look at the construction videos for more information.
完全な電気および配管の説明書が提供されます。

これらは、すべてを使用した非常に単純な手順です。
棚パーツ。

電気および配管部品が利用可能です
すべてのホームセンターから簡単に見つけることができます。

ベッド昇降機構の取り付けは非常に簡単です。
指示が提供されます。

詳しくは施工動画をご覧ください。
Van Stool


